MSP Handbook
A centralized handbook for our MSP team.
This repository contains:
- Coding Rules – Best practices for writing clean, maintainable code.
- Infrastructure as Code (IaC) – Guidelines and templates using Ansible and Terraform/Packer.
- Operational Best Practices – Standard procedures for managing infrastructure environments.
- Documentation – All docs are in Markdown for readability and easy version control.
Introduction
Markdown basic writing and formatting syntax
Markdown is a plain text format for writing structured documents, based on conventions for indicating formatting in email and usenet posts. It was developed by John Gruber (with help from Aaron Swartz) and released in 2004. In the next decade, dozens of implementations were developed in many languages.
Markdown is an easy-to-read, easy-to-write language for formatting plain text. Websites like Reddit, StackOverflow, and GitHub had millions of people using Markdown. And Markdown started to be used beyond the web, to author books, articles, slide shows, letters, and lecture notes.
In this guide, you'll learn some basic/advanced formatting features by creating or editing a markdown file.
Headings
To create a heading, add one to six # symbols before your heading text. The number of # you use will determine the hierarchy level and typeface size of the heading.
# A first-level heading
## A second-level heading
### A third-level heading

Creating a table
You can create tables with pipes | and hyphens -. Hyphens are used to create each column's header, while pipes separate each column. You must include a blank line before your table in order for it to correctly render.
| First Header  | Second Header |
| ------------- | ------------- |
| Content Cell  | Content Cell  |
| Content Cell  | Content Cell  |

The pipes on either end of the table are optional.
Cells can vary in width and do not need to be perfectly aligned within columns. There must be at least three hyphens in each column of the header row.
Markdown table with the commands formatted as code blocks. Bold and italic formatting are used in the descriptions
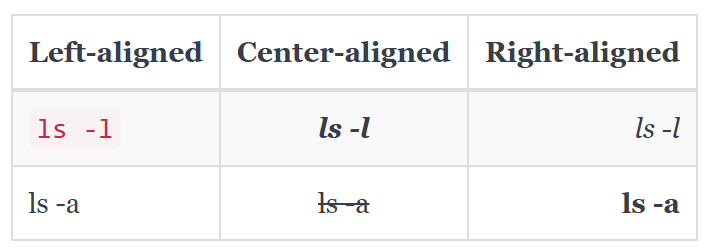
You can align text to the left, right, or center of a column by including colons : to the left, right, or on both sides of the hyphens within the header row.
| Left-aligned | Center-aligned | Right-aligned |
| :--- |            :-:      |                 -----: |
| `ls -l`   | ***ls -l***    | _ls -l_    |
| ls -a     | ~~ls -a~~        | **ls -a**       |
Styling text
You can indicate emphasis with bold, italic, strikethrough, subscript, or superscript text in comment fields and .md files.
| Style | Syntax | Example | Output |
|---|---|---|---|
| Bold | ** ** or __ __ | **This is bold text** | This is bold text |
| Italic | * * or _ _ | _This text is italicized_ | This text is italicized |
| Strikethrough | ~~ ~~ or ~ ~ | ~~This was mistaken text~~ | |
| Bold and nested italic | ** ** and _ _ | **This text is _extremely_ important** | This text is extremely important |
| All bold and italic | *** *** | ***All this text is important*** | All this text is important |
| Underline | <ins> </ins> | This is an <ins>underlined</ins> text | This is an underlined text |
| Inline code | ` ` (single `) | `systemctl status nginx` | systemctl status nginx |
Code blocks (triple backticks)
To format code or text into its own distinct block, use triple backticks.
Use triple backticks to format commands or config as a standalone block.
You can add a language hint for syntax highlighting (e.g.,shell, bash, yaml,console, ...).
Ansible playbook example:
- name: Ensure Nginx is installed
    apt:
    name: nginx
    state: present
    update_cache: true

- name: Ensure Nginx is enabled and running
    service:
    name: nginx
    state: started
    enabled: true
Linux example:
# Update packages (Debian/Ubuntu)
sudo apt update && sudo apt upgrade -y

# Check disk usage
df -h
Quoting text
You can quote text with a >.
Text that is not a quote

> Text that is a quote
Quoted text is indented with a vertical line on the left and displayed using gray type.

Lists
You can make an unordered list by preceding one or more lines of text with -, *, or +.
- Mr A
* Mr B
+ Mr C

To order your list, precede each line with a number.
1. Mr A
2. Mr B
3. Mr C
Nested Lists
You can create a nested list by indenting one or more list items below another item.
Type space characters in front of your nested list item until the list marker character (- or *) lies directly below the first character of the text in the item above it.
1. First list item
   - First nested list item
     - Second nested list item

[!NOTE] In the web-based editor, you can indent or dedent one or more lines of text by first highlighting the desired lines and then using Tab or Shift+Tab respectively.

In this example, you could add a nested list item under the list item 100. First list item by indenting the nested list item a minimum of five spaces, since there are five characters (100. ) before First list item.
100. First list item
     - First nested list item

You can create multiple levels of nested lists using the same method. For example, because the first nested list item has seven characters (␣␣␣␣␣-␣) before the nested list content First nested list item, you would need to indent the second nested list item by at least two more characters (nine spaces minimum).
100. First list item
     - First nested list item
       - Second nested list item

Alerts
Alerts are a Markdown extension based on the blockquote syntax that you can use to emphasize critical information. They are displayed with distinctive colors and icons to indicate the significance of the content.
Additionally, you should avoid placing alerts consecutively. Alerts cannot be nested within other elements.
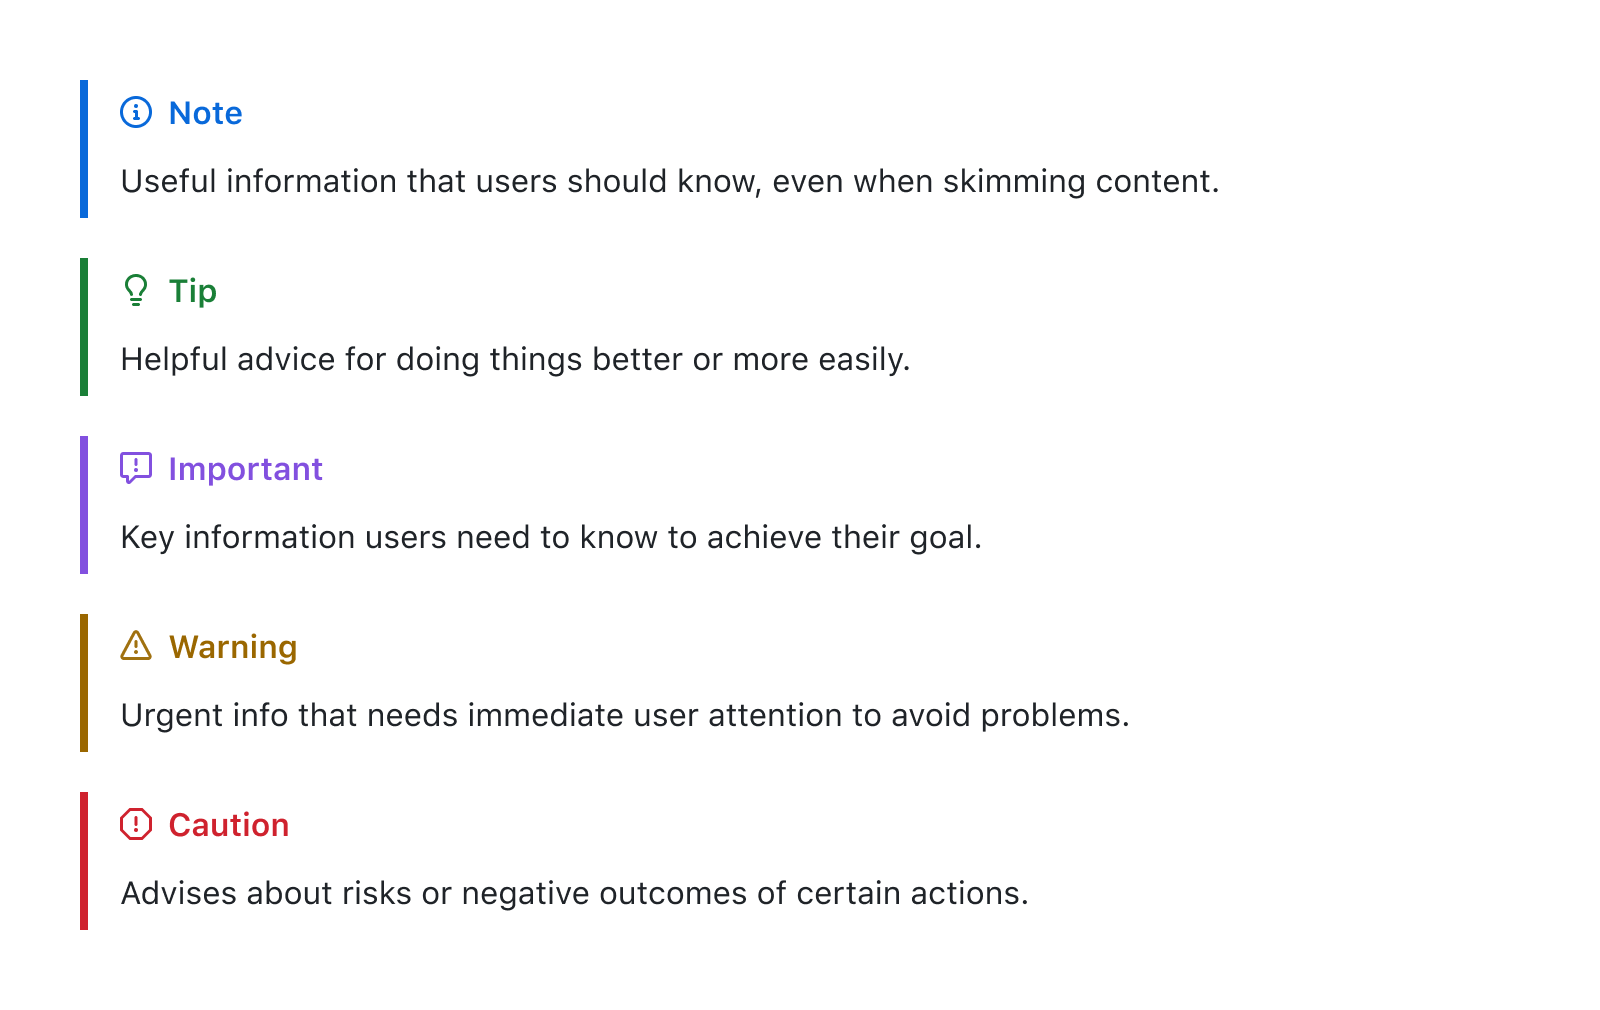
To add an alert, use a special blockquote line specifying the alert type, followed by the alert information in a standard blockquote. Five types of alerts are available:
> [!NOTE]
> Useful information that users should know, even when skimming content.

> [!TIP]
> Helpful advice for doing things better or more easily.

> [!IMPORTANT]
> Key information users need to know to achieve their goal.

> [!WARNING]
> Urgent info that needs immediate user attention to avoid problems.

> [!CAUTION]
> Advises about risks or negative outcomes of certain actions.
Here are the rendered alerts:
Task lists
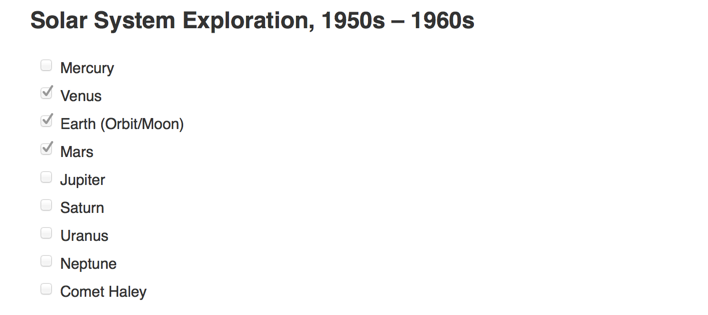
Task lists are incredibly useful for project coordination and keeping track of important items. Starting today, we are adding read-only task lists to all Markdown documents in repositories and wikis. So now, when you write:
### Solar System Exploration, 1950s – 1960s

- [ ] Mercury
- [x] Venus
- [x] Earth (Orbit/Moon)
- [x] Mars
- [ ] Jupiter
- [ ] Saturn
- [ ] Uranus
- [ ] Neptune
- [ ] Comet Haley
Edit the document page and use the - [ ] and - [x] syntax to update your task list.
It will render like this:
Images
You can display an image by adding ! and wrapping the alt text in [ ]. Alt text is a short text equivalent of the information in the image. Then, wrap the link for the image in parentheses ().


You can display an image from your repository, add a link to an online image, or upload an image.
[!NOTE] When you want to display an image that is in your repository, use relative links instead of absolute links.
Creating a collapsed section
You can temporarily obscure sections of your Markdown by creating a collapsed section that the reader can choose to expand.
The Markdown inside the <summary> label will be collapsed by default and after a reader Click , the details are expanded:
Click
Heading
- Foo
- Bar
- Foo
- Bar
Some Ansible Task
- name: Ensure Nginx is installed
  apt:
  name: nginx
  state: present
  update_cache: true
For example : The collapsed section contains headers, text, and code blocks.
<details>
  <summary>Click me</summary>

  ### Heading
  1. Foo
  2. Bar
     * Foo
     * Bar

  ### Some Ansible Task
  ```yaml
- name: Ensure Nginx is installed
    apt:
    name: nginx
    state: present
    update_cache: true
  ```
</details>
Ansible Coding Standards
YAML format
- Do
yamllint . - Each line must be less than 80 characters long.
-
We can insert line breaks in
{{ ... }}. -
Wrap long lines using
>-,\. Example
# vars file
vault_hostname: >-
  {{
    lookup('env', 'ANSIBLE_HASHI_VAULT_ADDR') |
    default('https://vault.example.com:8200') |
    urlsplit('hostname')
  }}
# -> "gsvlt1401-dev.grp-dev.p2.iijgio.jp"

very_long_line_with_space: >-
  abcdefghijklmnopqrstuvwxyz
  abcdefghijklmnopqrstuvwxyz
  abcdefghijklmnopqrstuvwxyz
  {{ vault_hostname }}
# -> "abcdefghijklmnopqrstuvwxyz abcdefghijklmnopqrstuvwxyz abcdefghijklmnopqrstuvwxyz gsvlt1401-dev.grp-dev.p2.iijgio.jp"

very_long_word_without_space: "\
  abcdefghijklmnopqrstuvwxyz\
  abcdefghijklmnopqrstuvwxyz\
  abcdefghijklmnopqrstuvwxyz\
  {{ vault_hostname }}"
# -> "abcdefghijklmnopqrstuvwxyzabcdefghijklmnopqrstuvwxyzabcdefghijklmnopqrstuvwxyzgsvlt1401-dev.grp-dev.p2.iijgio.jp"

multiline_text: |-
  abcdefghijklmnopqrstuvwxyz
  abcdefghijklmnopqrstuvwxyz
  abcdefghijklmnopqrstuvwxyz
  vault_hostname
# -> "abcdefghijklmnopqrstuvwxyz\nabcdefghijklmnopqrstuvwxyz\nabcdefghijklmnopqrstuvwxyz\nvault_hostname"
-
- Use
trueorfalsefor boolean.- Do not use
yes,no,TrueorFalse
- Do not use
- Indentation must be two (single-byte) spaces.
- Insert spaces appropriately.
- After
: - Before and after
|for filter - After
{{and before}}
- After
- Insert blank line between tasks.
Loops
- Use
loopinstead ofwith_<lookup>basically. - Use
labeldirective withloop_controlwhen looping over complex data structures.
Variables
Where to set variables
- Use
group_vars,host_varsor direct definition in hosts file.- These variables are automatically loaded for each host.
- Do not use
vars_fileskeyword orinclude_varsmodule basically.
- Refer link for detailed behavior.
Variable Name
-
Use
snake_case_style. -
Use prefix
<role_name>_to role variables.- Use prefix
<collection_name>_to common variables in the collection
and set<collection_name>_xxxas default for<role_name>_xxx.
- Use prefix
-
Use prefix
_for variables defined byregisterorset_factmodule.- ansible.builtin.ping: register: _ping_result - set_fact: _sample: "Sample"
Role Variables
- Use
defaults/main.ymlfor default parameter.# sample_role/default/main.yml --- sample_role_arg_a: 10 sample_role_arg_b: "{{ sample_collection_param_b }}" - (Should) Validate arguments.
- If
meta/argument_specs.ymlis present, parameters will be validated at the beginning of role execution. https://docs.ansible.com/ansible/latest/user_guide/playbooks_reuse_roles.html#role-argument-validation
# sample_role/meta/main.yml --- argument_specs: # default entry point main: short_description: Sample Role options: sample_role_arg_a: type: "int" default: 10 description: "Sample argument A" sample_role_arg_b: type: "list" elements: "str" default: "{{ sample_collection_param_b }}" description: "Sample argument B" sample_role_arg_c: type: "str" required: true description: "Sample argument C" - If
Documentation Guideline
Network Diagram
- Drawing with
https://www.drawio.com/. - Use icons from https://clarity.design/documentation/icons/shapes.
- Otherwise, use the text in a frame.
- Use text + horizontal ellipses for networks such as the Internet and WAN.
- Use editable format for future updates.
- e.g.
.drawio.pngor.drawio.svg.
- e.g.
- Sample Diagram
